For this lesson, photographer Jay P. Morgan went on location to create a series of rain shots with the new Canon 1DC. His goal was to shoot all video and pull still images from the footage. He tested different shutter speeds to see how they affected both the video and stills. As you'll see, rain turned out to be the perfect subject matter to test the practice of pulling still frames from video. You might like to read PhotographyTalk.com review for Canon 1DX Mark II.
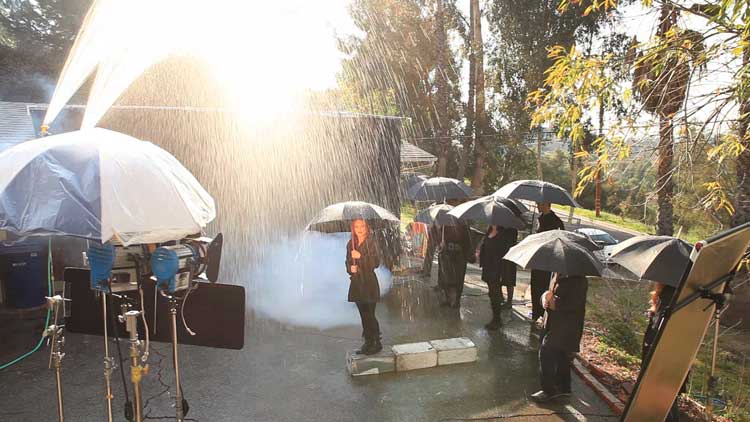
First, we set up two 12X12-foot Duvateens side-by-side to create our background. Duvateen is a black fabric that does not reflect light so it's perfect to create a black background. Using Sun Seeker (an iPhone app), I positioned the Duvateens at an angle that would be ideal with the sun as a back rim light. To illuminate rain, it really needs to be lit from behind.

For "rain", we went with our tried-and-true fan nozzles. You can see all about making rain in an earlier lesson, entitled Rainy Day Magic on a Sunny Day. These nozzles were placed camera left pointing up with water "raining" onto the people with umbrellas.
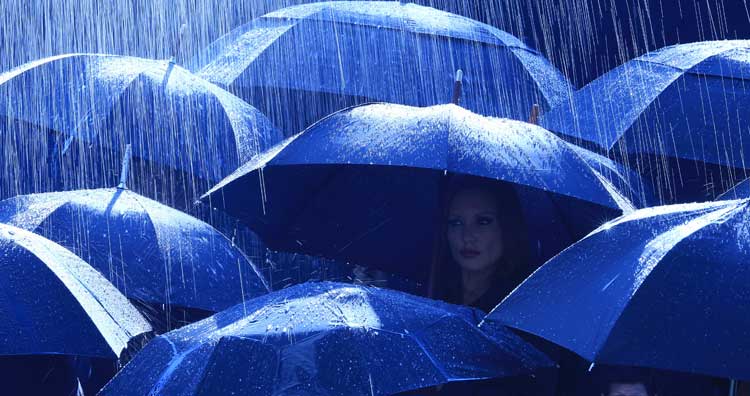
I wanted the images to look like they were shot at night, so I set the white balance on the Canon 1DC to Tungsten, or 3200 degrees Kelvin. Since the daylight at this time of day was closer to 5500 degrees Kelvin, this adjustment to the white balance setting made the sunlight appear very blue. Here's our first shot with the rain and sunlight only.
From camera left, we added a 1000-watt fresnel light to illuminate our primary model's face, but it wasn't enough.
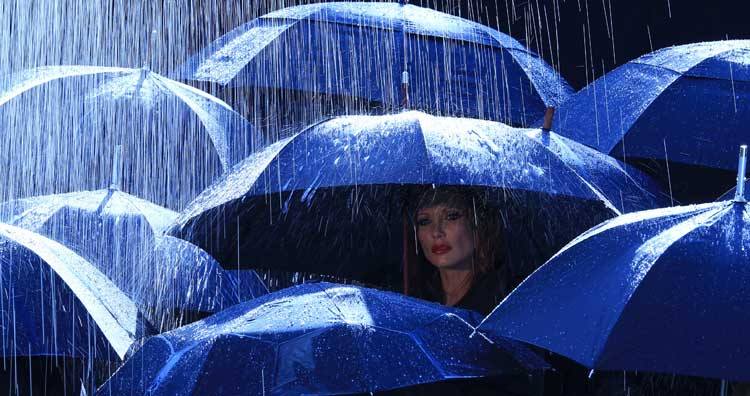
Since we had to compete with the sun as a backlight, we needed more power. After adding an additional 2000 watts, the exposure on the model looked much better.
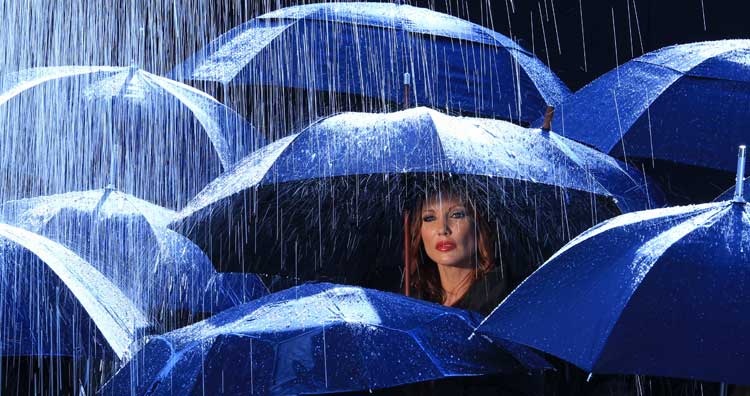
The shot needed a little fill on the shadow side of the model's face, so we added a Photoflex 39x72 LitePanel to camera right with white fabric to bounce sunlight into the shadows.

As a preventative measure, we used a large golf umbrella covered with plastic on a C-stand to keep the water off the lights. Simple but effective.
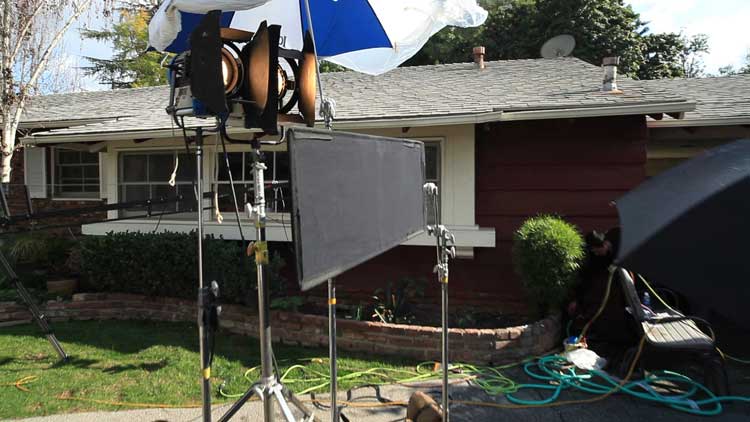
For a finishing tough, we added "mist" to the scene by using a smoke machine.

Once we had our lights in place, we used a stand-in model to test the shutter speeds. First, I shot at 24 frames per second, an aperture of f/13, and a shutter speed of 1/50th of a second. This provided nice blur to the rain, but when the model moved, he would also be blurry in the video.
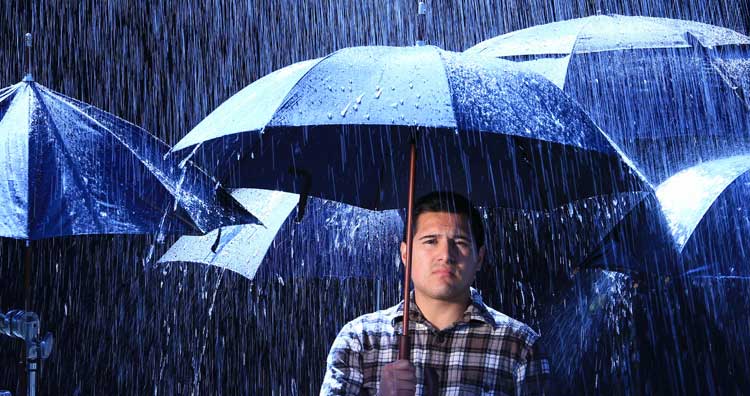
Next, I shot at 1/100th of a second. Here, the raindrops were rendered as shorter lines in each frame, but the didn't blur together well in the video. The shortened dashes didn't look as good in the still frames, either.
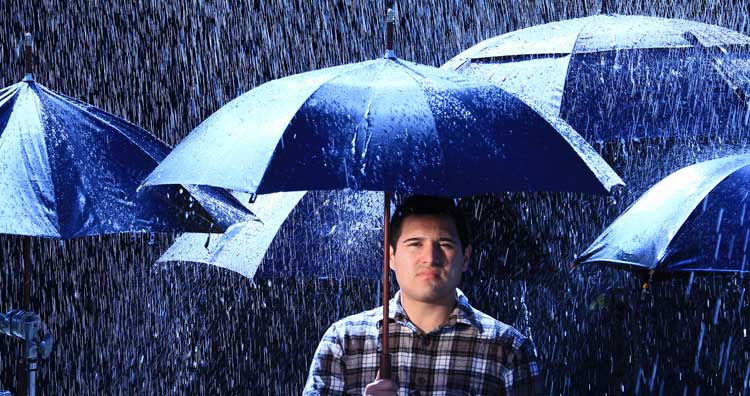
At 1/200th of a second, the rain drops in each still were very short lines and really wasn't the look I was going for. The model's face, on the other hand, barely blurred as he moved.
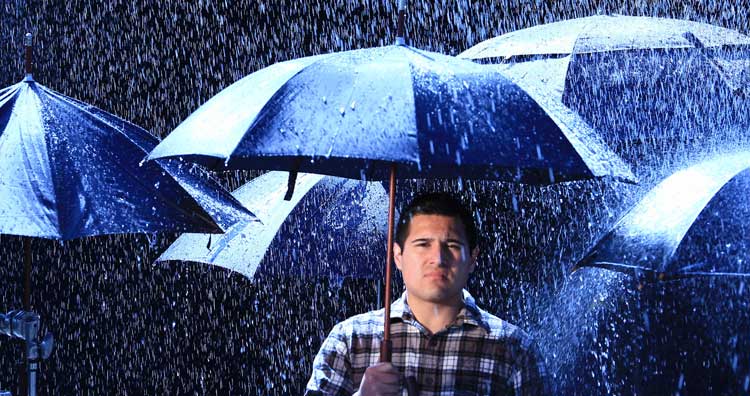
Here's another view of the LitePanel fill. Note the new LitePanel Hardware supporting the frame.

After the test shots, we brought our primary model back in and I decided to shoot back at 1/50th of a second. The long, blurred lines of rain, particularly in the still images, looked really great.
Written and photographed by Jay P. Morgan
To see more of Jay P. Morgan's work, visit his Pro Showcase page
This blog post about "Lighting Rain and Pulling Stills from a Canon EOS-1DC DSLR Camera" was first published on our website here https://www.photographytalk.com/photography-articles/3372-lighting-rain-and-pulling-stills-from-a-canon-eos-1dc