When you gaze upon a landscape with your own eyes, you see the entire scene in sharp focus. Recreating that focus in the images you make of the landscape will have a lot to do with the image’s success or failure.
However, with some elements that might just be a few feet away from your lens and others that might be miles away, it’s necessary to take steps to ensure that all of that scenery is in sharp focus. Learn more about scenery photography on our website PhotographyTalk.com.
But how?

To get maximum sharpness in your images, you’ll need to use the principle of depth of field. Let’s explore a few critical components of this concept.
Depth of Field Defined

When you raise your camera to your eye and adjust the focus of the lens on a specific landscape element, you’re creating a focal plane that is parallel to the sensor.
That is, only the elements along that plane are in the sharpest focus - elements behind that plane and in front of it are not. That area of sharp focus is called depth of field.
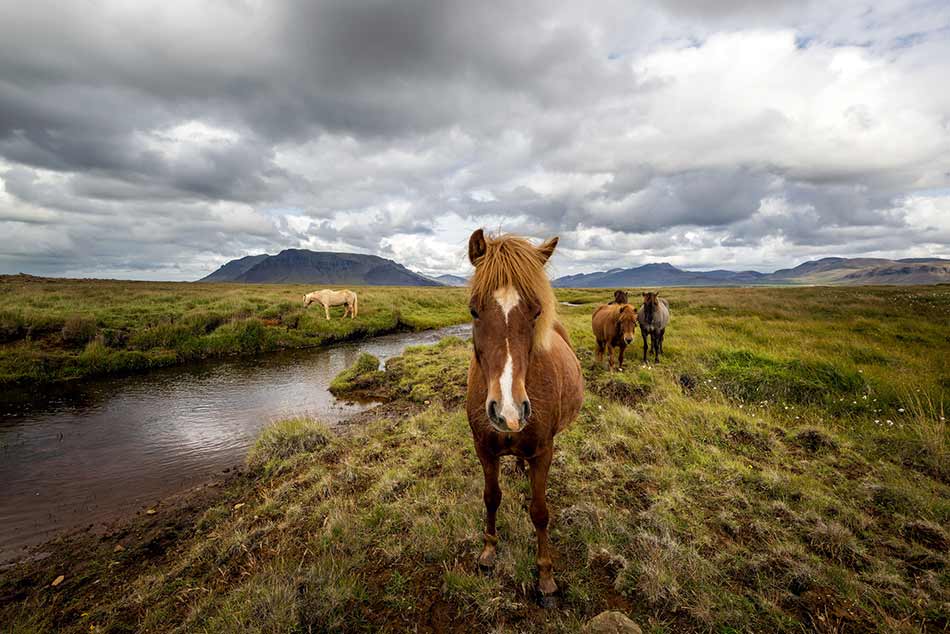
For example: in the image above, the focal point is the horse in the foreground. As a result, the plane of focus falls across that horse, which is where the maximum areas of sharpness are in the photo. Everything in front of the horse (i.e. the grasses in the foreground) and everything behind the horse (i.e. the other horses and the mountains in the background) are outside the depth of field and are therefore not as sharp.
Note that the depth of field does not fall equally in front of and behind the focal point. Just one-third of the area of maximum sharpness is in front of the focal plane with the other two-thirds falling behind that point.
Factors That Impact Depth of Field

There are, however, a number of factors that influence the size of depth of field. If you find that the area of acceptable sharpness is too small, you can adjust any of the following to get a larger depth of field:
- Aperture - The smaller the aperture (the larger the f-number), the greater the depth of field. For example, at f/22 you’ll have a greater depth of field than you will at f/2.8, all else being equal.
- Distance to focal point - As the distance between your lens and the focal point increases, so too does the depth of field. For example, if your focal point is three feet away, the depth of field will be much smaller than if the focal point is 30 feet away.
- Focal length - The shorter the lens, the greater the depth of field, so, a wide-angle lens offers a deeper depth of field than would be possible with a telephoto lens, all else being equal.
- Sensor size - The larger the sensor, the shallower the depth of field, all else being equal. That means that if you use the same aperture, lens focal length, and are the same distance to the focal point with a full frame camera (large sensor) and an APS-C camera (smaller sensor), the full frame camera will produce a shallower depth of field.
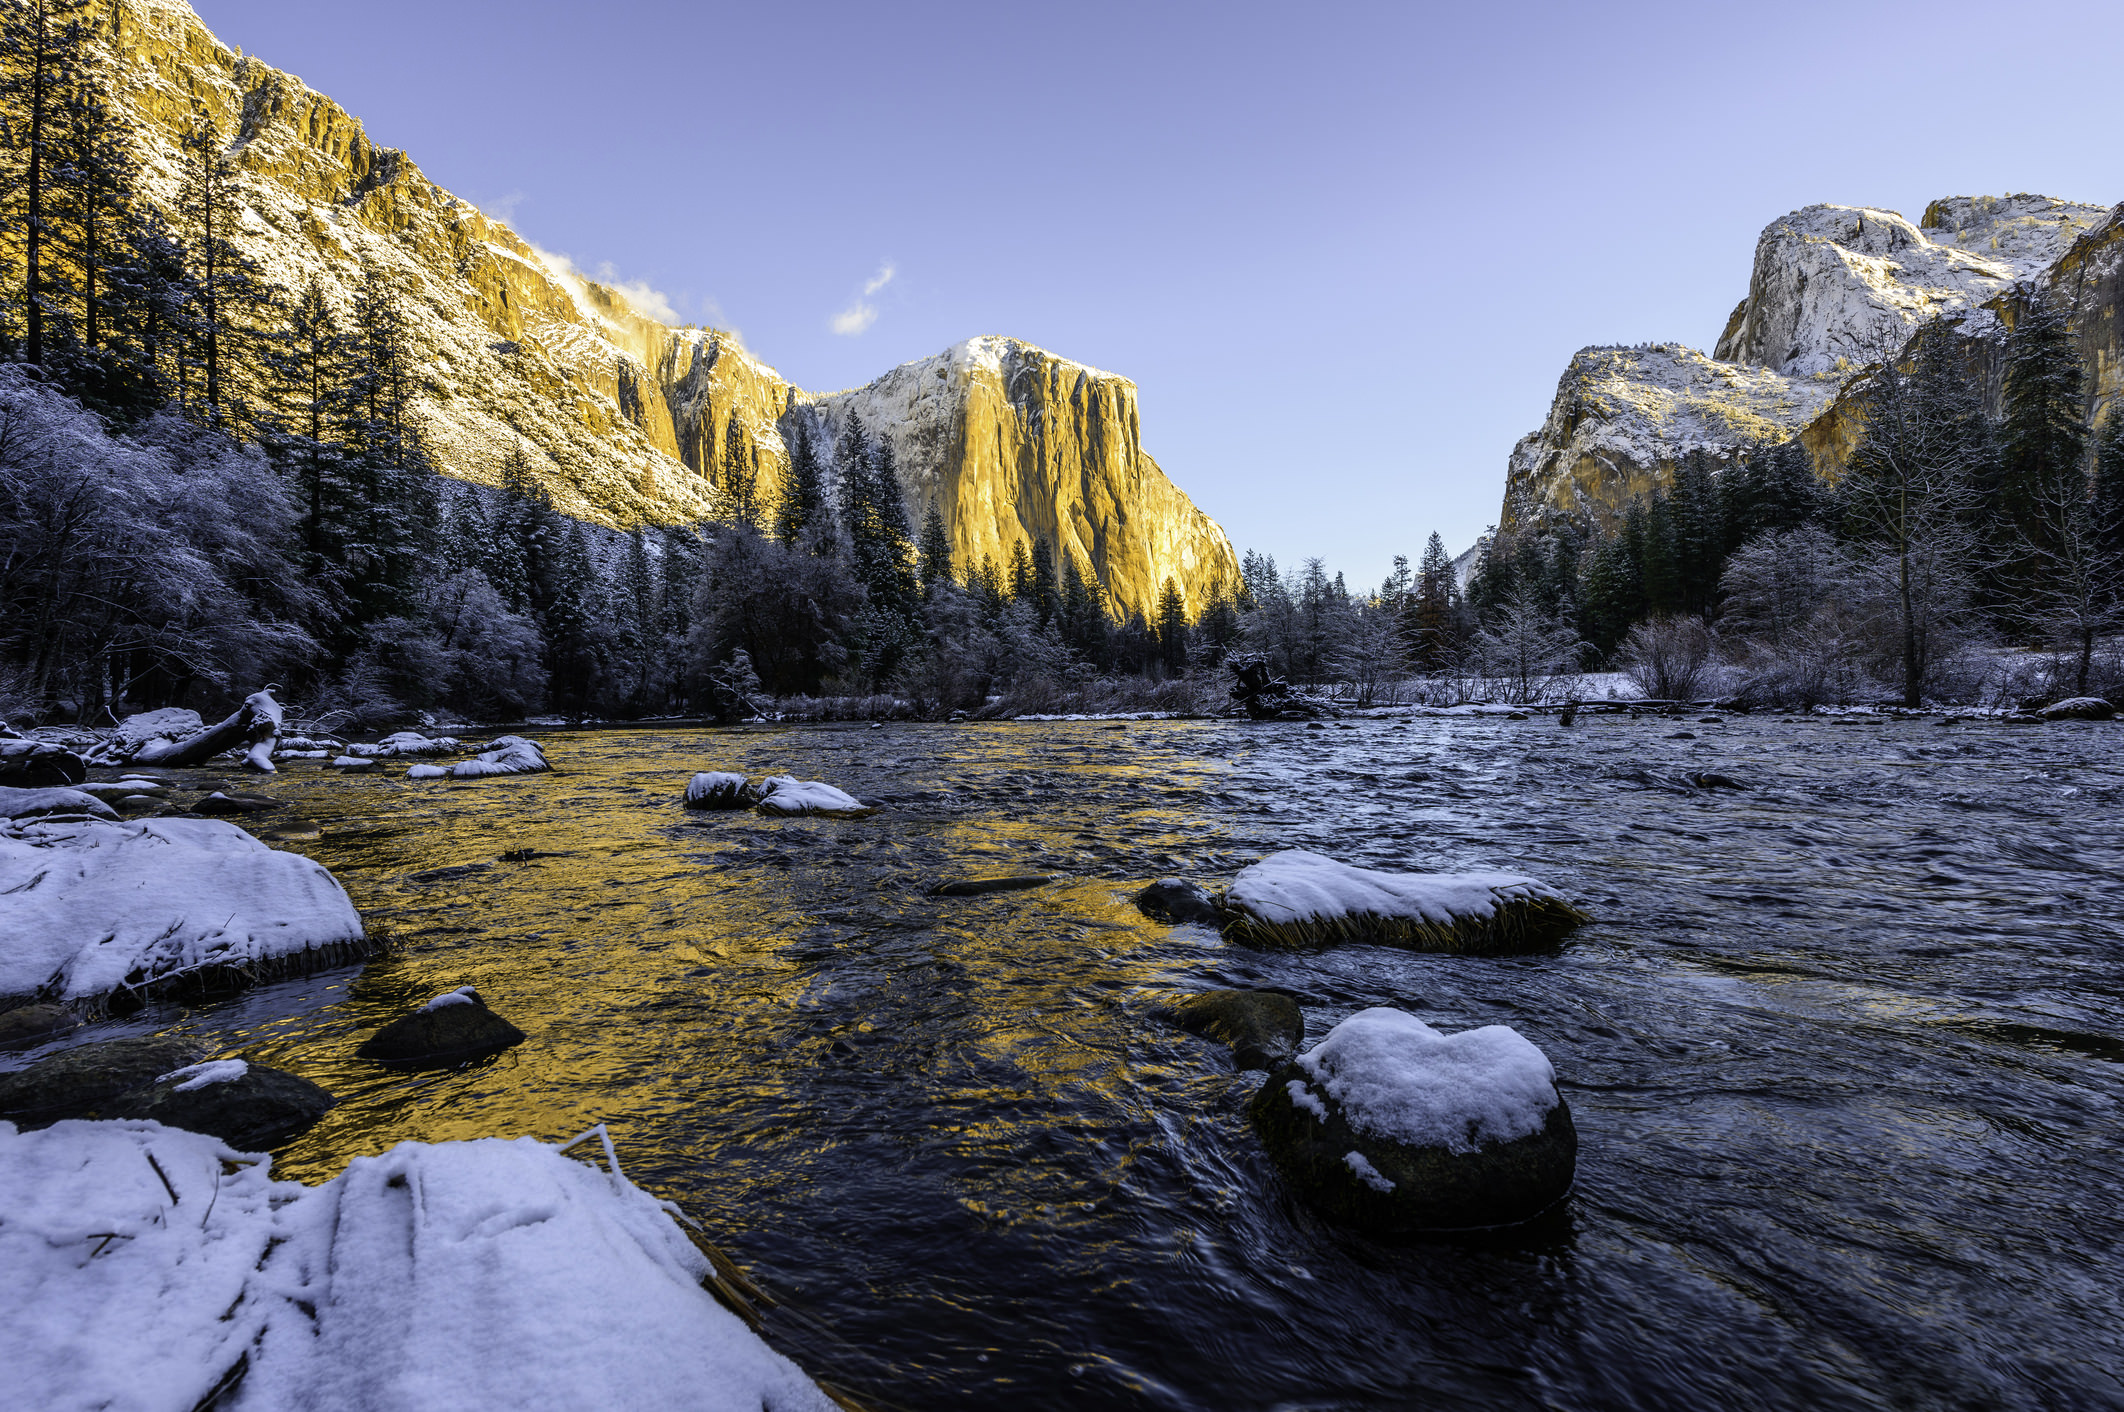
For example: In the image of the Yosemite Valley above, we see how the first three factors above have been used to maximize depth of field. A wide angle lens has been used, and, combined with a small aperture, the entire scene is acceptably sharp from the rock in the foreground to the mountains in the background. Note how the rock is far enough away from the photographer’s shooting position that it falls within the depth of field.
Using Hyperfocal Distance

Though “hyperfocal distance” sounds highly technical and scary, it is one of the most effective methods a photographer can use to ensure everything in the scene is acceptably sharp.
Hyperfocal distance helps you generate a depth of field that puts everything from the foreground to infinity in focus. Put simply, to maximize depth of field you need to focus at the hyperfocal distance for the aperture and focal length that you have selected. That means that by choosing the best aperture for landscape photography and adjusting the point of focus to the hyperfocal distance that the entire scene will be acceptably sharp.

The problem is that the mathematical calculation to determine hyperfocal distance isn’t exactly an easy one to grasp. Fortunately, there are many apps and websites that make those calculations for you.
For example: In the mountain scene above, if the point of focus was placed on the horizon line, the hyperfocal distance technique suggests that everything from about one-third from the bottom of the frame (i.e. the lakeshore) all the way to infinity will be acceptably sharp. In other words, by carefully selecting your focal point, you can determine which areas of the scene fall within the depth of field. If you want more of the background in focus, shift the focal point upwards in the frame. If you want more foreground in focus, shift the focal point downward in the frame. With practice, it will become far easier to understand where to shift your focal point to manipulate the depth of field based on the hyperfocal distance calculations.
A Hyperfocal Distance Hack

Because depth of field extends one-third in front of the focal point and two-thirds behind it, many photographers simply focus one-third of the way into the scene when using a very small aperture like f/22 to maximize depth of field.
In theory, this is a good trick to use because it will often result in an adequate depth of field. The problem is in the selection of a tiny aperture. As you select apertures at the extreme ends of a lens’ range, image sharpness begins to decline due to diffraction. So, by using the smallest possible aperture to get a large depth of field, you might actually negate the benefits of the large depth of field because the lens isn’t its sharpest at f/22. This lack of sharpness is especially evident around the edges of the frame.
Instead, endeavor to choose apertures in the lens’ sweet spot, or area of maximum sharpness. The sweet spot is different for every lens, but a good rule of thumb is that f/8 or f/11 will yield the sharpest photos. As a result, when using this hyperfocal distance hack, select f/8 or f/11, and then choose a focal point about one-third of the way from the bottom of the frame. The results will be sharper from edge to edge and from foreground to background.
With that, you have a better understanding of depth of field. You’re now also armed with the hyperfocal distance technique to maximize depth of field. Download a hyperfocal distance app to help you make perfect calculations, and keep the hyperfocal distance hack in mind as well. It will take a little practice, but with time, you’ll likely see landscape images that are sharper with a larger depth of field.
Get more details on hyperfocal distance in the video above by Brenda Petrella Photography.
This blog post about the topic "Landscape Photography Primer: Getting Sharp Images With Depth of Field and Hyperfocal Distance" was first published on our website here https://www.photographytalk.com/landscape-photography/7215-landscape-photography-primer-getting-sharp-images-with-depth-of-field-and-hyperfocal-distance