Let's face it - there are a ton of factors involved in creating a beautiful landscape photo. You need great light, a solid composition, the right gear, and your timing needs to be spot on, too.
But there's more to do after you take the photo...
If you want to maximize the quality of the shots you take, you need to learn how to edit landscape photos.
Joshua Cripps of Professional Landscape Photography Tips offers a great introductory tutorial on editing landscape photography in the video above.

Have a detailed look at some of Joshua's tips and tricks below.
Post Processing Photos Should Begin in Adobe Camera RAW
 YouTube Screenshot/Professional Photography Tips
The beauty of shooting your landscape photos in RAW format is that it preserves all the data collected by the camera's sensor, unlike a JPG.
With all that data, you can make many more manipulations to your images, and non-destructive changes at that.
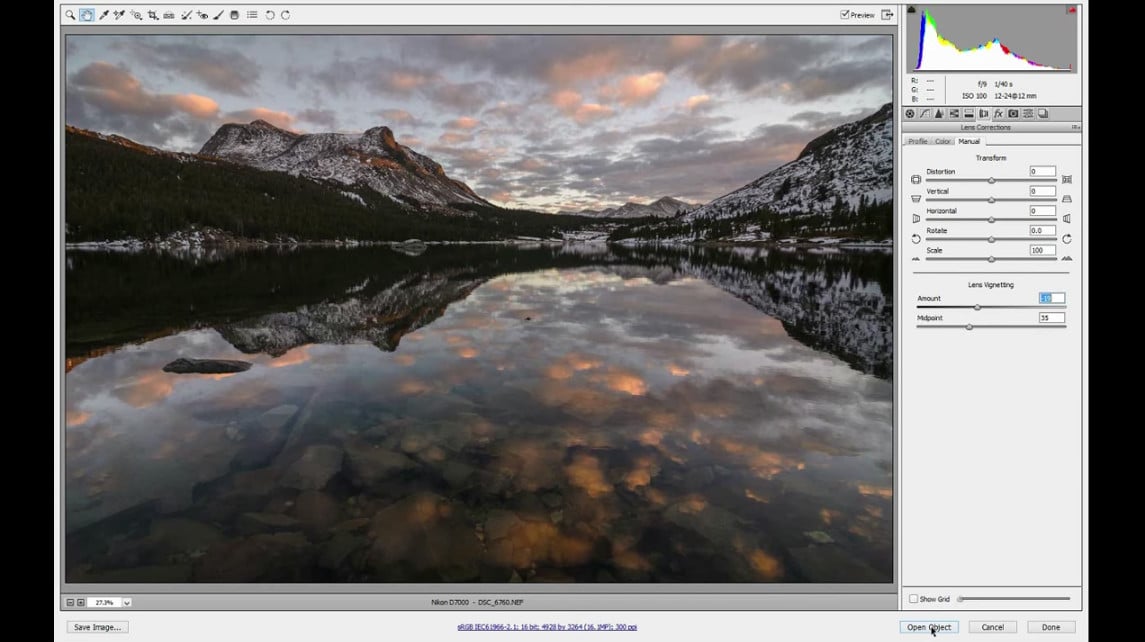
Adobe Camera RAW is like a primer for Photoshop in that you can make changes to things like exposure, contrast, highlights, shadows, and so forth.
It's easy to do, too. Just open your image in Camera RAW, and use the sliders you see above to make improvements to the shot.
You can also make adjustments to curves, add a vignette, apply a graduated filter, and many other handy things to make your photo pop, all before you ever open it in Photoshop.
In the screenshot above, you can see how much better the image already looks after just a few adjustments in Camera RAW.
Open the Photo in Photoshop and Get to Work
 YouTube Screenshot/Professional Photography Tips
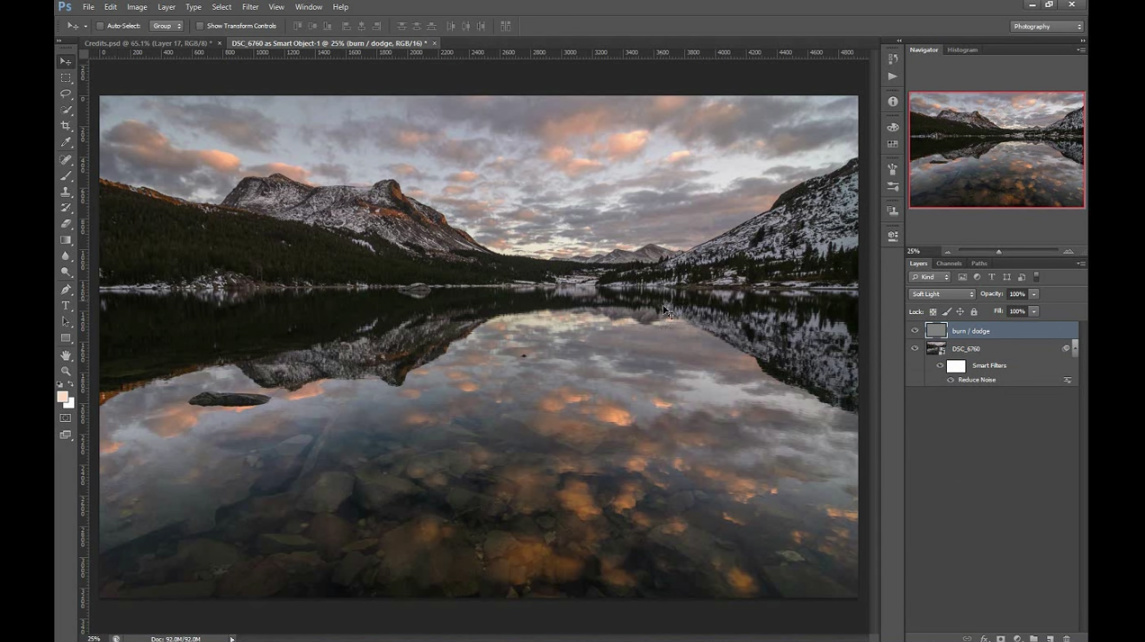
The real fun of editing landscape photography starts when you open the image in Photoshop.
That's because Photoshop is rife with advanced tools that allow you to really punch up the drama in your photos.
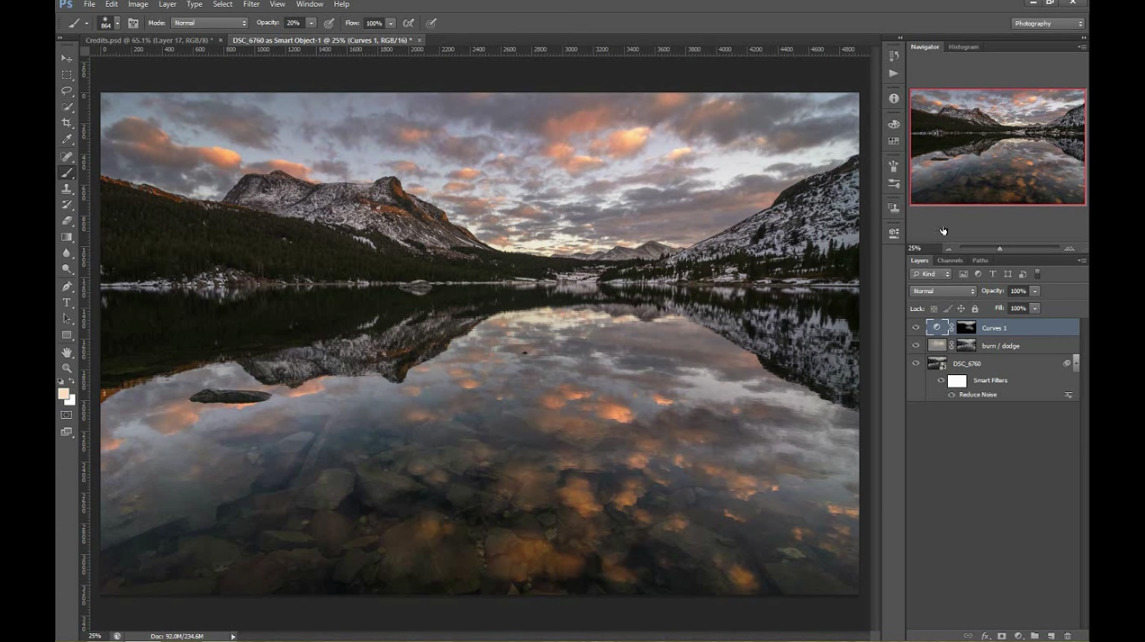
As seen in the video above, Joshua adds a Dodge/Burn layer to his image to help bring more attention to the mountains in the background.
Dodging and burning is an old film technique that allows you to brighten (dodge) or darken (burn) certain areas of the image. Of course, Photoshop automates that process for you.
 YouTube Screenshot/Professional Photography Tips
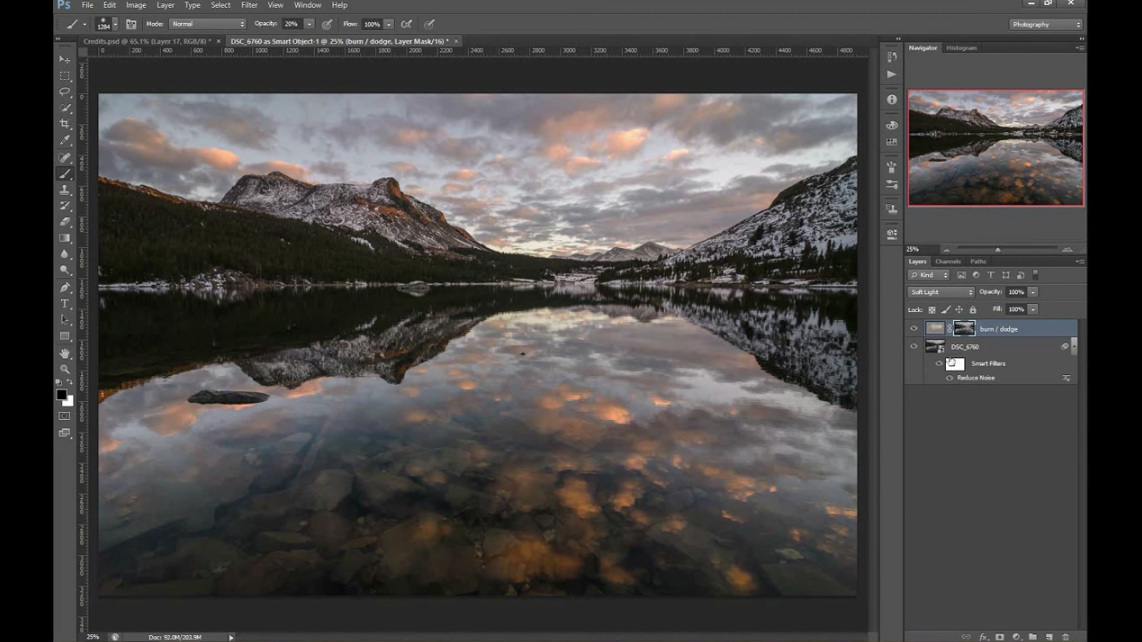
Essentially, all Joshua does to brighten the mountain peaks is paint on the Dodge/Burn layer with a light color that he color-picked from the clouds.
This is important because by picking a color that's already in the photo, it makes the areas he's working on look like they were naturally that bright and colorful.
As you can see in the comparison between the before and after images above, it's not a huge difference, but it's just enough to make the mountain peaks a little more eye-catching.
Improve Contrast by Using the Curves Adjustment
 YouTube Screenshot/Professional Photography Tips
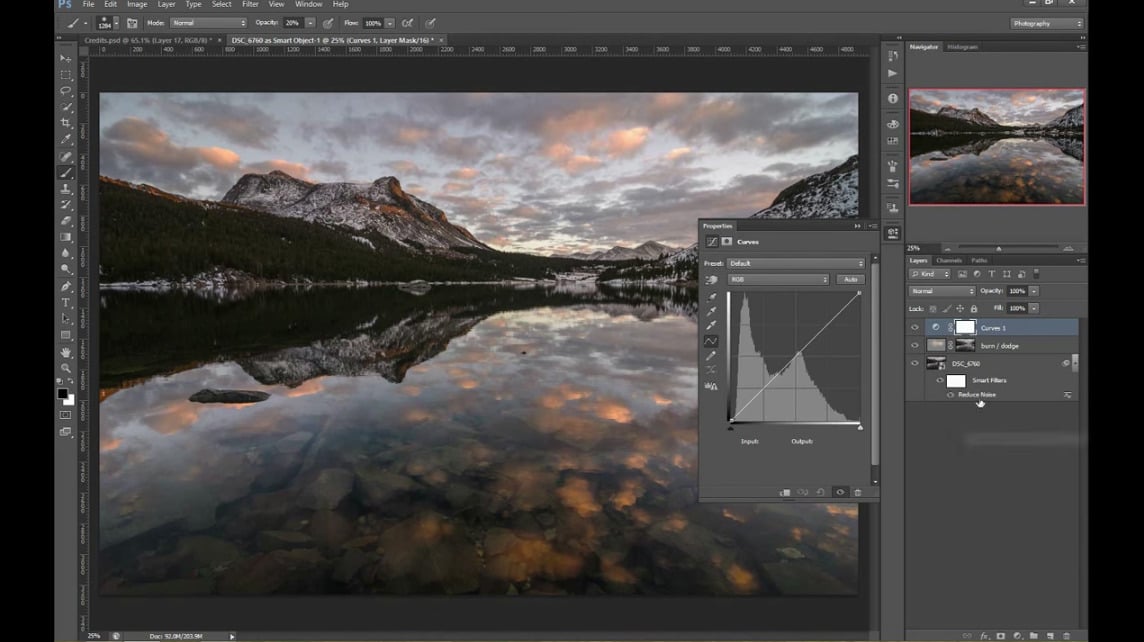
If you have a landscape photo that's got a sky that's a little too bright and light on the contrast, you can easily correct that in Photoshop by using the Curves adjustment.
In the screenshot above, you can see the Curves adjustment panel. In its beginning state, the Curves line is perfectly flat.
But by pulling the highlights up and the shadows down, you get more of an S-curve shape, as seen below.
 YouTube Screenshot/Professional Photography Tips
The result of manipulating the curves in this manner is a photo with more contrast.
And with more contrast, the elements of the image - the sky, the mountains, and their reflections, are more visually appealing with more pop.
Now, there are other adjustments you'll likely need to make when using Curves because the changes made can often darken parts of the image too much.
For a complete tutorial on how to maximize the effectiveness of the Curves adjustment, be sure to watch Joshua's video above.
More Landscape Tutorials
Joshua Cripps has tons of other landscape photography tutorials on photoshop, taking photos, gear, and more. Be sure to check his YouTube channel for more details!
Additionally, you can vastly improve the quality of your photos in landscape camera by using high-quality photo filters like those from Formatt-Hitech.
Formatt-Hitech has built a reputation for quality materials and high-performing filters over the years, and I can attest to that quality firsthand.
I've used their Firecrest Polarizing Filter, various Firecrest Graduated Neutral Density Filters, and various Firecrest Solid Neutral Density Filters as well.
Your ability to create breathtaking photos is only increased by using good photo filters. Get outfitted with filters and start taking better photos right now!
This article about the topic "Photoshop Tutorial: How to Edit Landscape Photos" was first published on our website here https://www.photographytalk.com/post-processing/8439-photoshop-tutorial-how-to-edit-landscape-photos